How Rental Inspections Get Documented: A 2026 Guide

TL;DR:
- Proper documentation of rental inspections creates clear records that protect landlords in disputes and audits. Using standardized checklists, photo and video evidence, tenant signatures, and secure digital storage ensures records are legally defensible and easy to retrieve. Regularly auditing and properly classifying inspection types helps distinguish normal wear from tenant-caused damage effectively.
Rental inspection documentation is the formal process of recording a property’s physical condition before, during, and after a tenancy using written notes, photos, and signed reports. How rental inspections get documented determines whether a landlord can defend a security deposit claim, prove lease compliance, or pass a regulatory audit. Done right, it creates a clear, timestamped record that protects both parties. Done poorly, it leaves landlords exposed to disputes they cannot win. This guide covers the exact steps, tools, and best practices that make inspection records legally defensible and operationally useful.
How are rental inspections documented step by step?
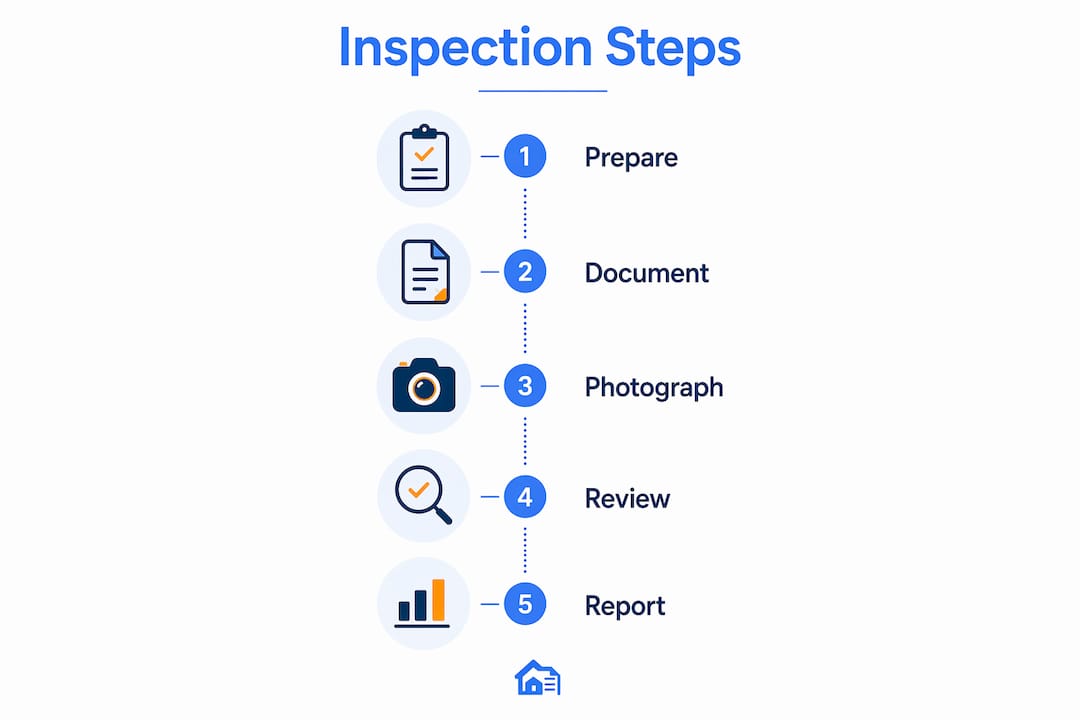
Systematic documentation follows a repeatable sequence. Skipping any step weakens the record’s credibility in a dispute.
-
Send legal notice of entry. Written notice is required 24–48 hours before any inspection, and the visit must occur between 8:00 AM and 7:00 PM. This protects tenant privacy and keeps you on the right side of tenancy law. Use a standardized entry notice template to create a paper trail for every visit.
-
Prepare a room-by-room checklist. Use the same template for every inspection type. A consistent checklist lets you compare move-in and move-out records side by side without ambiguity. List every surface, fixture, and appliance in each room with a condition rating and a plain-language note.
-
Write specific, objective condition notes. Vague language like “walls look okay” fails in court. Write “one 3-inch scuff mark on the north wall of the living room, approximately 4 feet from the floor.” Objective, traceable notes paired with timestamped evidence are the standard for legally defensible records. A third party reading your notes should be able to reconstruct exactly what you observed.
-
Capture photos and video. Move-in and move-out inspections require a minimum of 50 timestamped, high-resolution photos covering all surfaces, plus a continuous video walkthrough. That volume sounds like a lot until you face a $2,000 deposit dispute with no visual evidence. Photograph every room from multiple angles, then close-up any existing damage.
-
Conduct the inspection with the tenant present. Tenant presence and a signed report reduce security deposit disputes and build a collaborative relationship. When a tenant signs the checklist, they acknowledge the recorded condition. That signature carries real weight if the matter goes to a tribunal.
-
Generate and share the report promptly. Inspection reports should be shared within 48 hours of the walkthrough. Delays create doubt about when observations were made. Send the completed report to the tenant and retain a copy in your records.
Pro Tip: Number each photo in your report and reference the photo number in the corresponding checklist item. This cross-referencing makes your documentation far harder to challenge.
What tools support accurate inspection documentation?
Paper-based records are the single biggest documentation risk most landlords carry. A misplaced folder or an unsigned form can make an entire inspection record worthless.

Digital inspection systems store records in a secure, searchable cloud, reducing legal exposure and making audit responses fast. The shift from paper to digital is not about convenience. It is about preserving the integrity of your records over the full life of a tenancy, which can span years.
The features that matter most in any digital documentation tool include:
- Standardized form templates that enforce consistent room-by-room coverage on every inspection
- Photo and video integration that attaches images directly to checklist line items
- Automatic timestamping that records the exact date and time of each photo and note
- Digital signature capture that documents tenant acknowledgment without printing a single page
- Cloud storage with access controls that prevent unauthorized edits after the report is finalized
- Searchable record retrieval that lets you pull any inspection report in seconds during a dispute
Geotagged photos linked to checklist items add another layer of evidentiary value. They confirm where a photo was taken, not just when. That detail matters when a tenant disputes whether a specific room was inspected.
Pro Tip: Organize your digital records in a consistent folder structure: property address, then inspection type, then date. A searchable document storage system cuts retrieval time during disputes and regulatory reviews.
How do different inspection types change what you document?
Each inspection type serves a distinct legal and operational purpose. The documentation focus shifts depending on where you are in the tenancy cycle.
| Inspection type | Primary documentation goal | Key focus areas |
|---|---|---|
| Move-in | Establish baseline condition | All surfaces, fixtures, appliances; existing damage noted and signed |
| Periodic | Track maintenance needs and lease compliance | HVAC filters, smoke detectors, unauthorized alterations, cleanliness |
| Move-out | Compare current state to baseline | Damage beyond normal wear and tear; condition before any cleaning |
The move-in inspection is the foundation of your entire documentation record. Every future inspection references it. If the baseline is vague or incomplete, you cannot reliably prove what changed during the tenancy.
Periodic inspections serve a different function. They catch maintenance issues before they become costly repairs and confirm the tenant is complying with lease terms. Document what you find, not just what is wrong. A note that “all smoke detectors tested and functional” is as useful as noting a problem.
The move-out inspection is where documentation quality gets tested. Avoid cleaning before the move-out inspection. Photographing the property as vacated preserves the true condition evidence you need for any deposit dispute. Clean after you document, never before.
Using identical checklists across all three inspection types creates a direct 1:1 comparison that clearly separates normal wear and tear from tenant-caused damage. That distinction is the core of almost every security deposit dispute.
What makes inspection documentation legally defensible?
The standard for legally defensible documentation is simple: a third party who was not present should be able to read your records and reconstruct exactly what the property looked like. Most landlord documentation fails that test.
The practices that close that gap are:
- Use specific, measurable language. “Carpet stained” is not enough. “Three-inch circular stain near the bedroom door, brown in color, present at move-in” is defensible.
- Photograph context and close-ups. Take a wide shot showing the room, then a close-up of any damage. Context photos prove the close-up belongs to that specific room.
- Preserve timestamp and GPS metadata. Never strip metadata from inspection photos. That data is your proof of when and where each image was captured.
- Get tenant sign-off on every inspection. Tenant signatures not only help legally but also encourage tenant responsibility. A tenant who signs a move-in checklist is less likely to dispute its contents later.
- Store records securely and keep them accessible. Records that cannot be retrieved quickly are nearly as useless as records that do not exist. Use a system that lets you pull any report within minutes.
- Document before cleaning. Cleaning before a move-out inspection destroys the evidence you need most.
An undocumented inspection is legally equivalent to an inspection that never occurred. If you cannot produce a signed, timestamped record with supporting photos, you have no inspection at all from a legal standpoint.
Pro Tip: After every move-out inspection, send the tenant a written summary of findings within 48 hours. This creates a contemporaneous record and gives the tenant a chance to respond before any deposit deduction is made.
The landlord-tenant relationship documentation process extends beyond inspections. Every notice, receipt, and signed agreement contributes to the overall record that protects you in a dispute.
Key Takeaways
Thorough rental inspection documentation requires standardized checklists, timestamped photo evidence, tenant signatures, and secure digital storage to create records that hold up in any dispute or audit.
| Point | Details |
|---|---|
| Legal notice is non-negotiable | Provide written notice 24–48 hours before entry and inspect only between 8:00 AM and 7:00 PM. |
| Photo volume matters | Capture at least 50 timestamped photos per move-in or move-out inspection, plus a continuous video walkthrough. |
| Consistent templates protect you | Use the same checklist for every inspection type to enable clear 1:1 comparisons across the tenancy. |
| Digital records reduce legal risk | Cloud-based storage with access controls prevents loss, unauthorized edits, and slow retrieval during disputes. |
| Document before you clean | Photograph the property as vacated before any cleaning to preserve true condition evidence. |
What I’ve learned from years of watching documentation fail landlords
The most common documentation mistake I see is not laziness. It is false confidence. A landlord does a thorough walkthrough, takes a dozen photos on their phone, and files them in a camera roll with no labels, no cross-references, and no tenant signature. Six months later, when a deposit dispute lands, they cannot prove which photos belong to which unit, let alone which inspection.
The second mistake is treating the move-in inspection as a formality. Landlords rush through it because the tenant is eager to move in and the property looks fine. That baseline inspection is the most important document you will ever create for that tenancy. Every dispute you face later will be measured against it.
What actually works is treating every inspection like you expect it to be challenged. That mindset changes how you write notes, how many photos you take, and whether you ask the tenant to sign before they leave. I have seen landlords win deposit disputes on the strength of a single well-labeled photo that matched a checklist entry with a tenant signature. The evidence was unambiguous.
Digital tools have made this process faster, not harder. The landlords who resist going digital are usually the ones spending the most time in disputes. A move-out documentation checklist that is already structured, timestamped, and stored in the cloud takes less time to complete than a paper form and produces a far stronger record. The audit trail is built in.
My advice: audit your own documentation process once a year. Pull a random inspection report from 12 months ago and ask whether a judge could reconstruct the property’s condition from that record alone. If the answer is no, fix the process before the next dispute forces you to.
— Igor
Landlordforms tools that simplify your inspection records
Landlordforms is built for landlords managing 1 to 150 units who need professional documentation without the paperwork burden.

The free move-in/move-out checklist generator produces a structured, room-by-room PDF you can complete, sign, and store in minutes. Photo attachments and digital signatures are supported, so your records meet the standard for legal defensibility without manual assembly. All documents are organized in one place, making retrieval fast when a dispute or audit arrives. Landlordforms reports saving up to eight hours a week on paperwork tasks. Explore the full landlord document template library to cover every stage of the tenancy cycle.
FAQ
What should a rental inspection report include?
A rental inspection report should include a room-by-room condition checklist, specific written notes, at least 50 timestamped photos, and tenant and landlord signatures. The report must be objective and detailed enough for a third party to reconstruct the property’s condition.
How soon after an inspection should the report be shared?
Inspection reports should be generated and shared within 48 hours of the walkthrough. Prompt sharing creates a contemporaneous record and gives tenants the opportunity to raise any concerns before the findings are finalized.
Do landlords have to give notice before an inspection?
Landlords must provide written notice 24–48 hours before entering a rental property for an inspection. The visit must also occur during permitted hours, typically between 8:00 AM and 7:00 PM, to comply with tenant privacy laws.
Why is the move-in inspection the most important one?
The move-in inspection establishes the baseline condition of the property. Every future inspection, including the move-out, is compared against it. A weak or incomplete move-in record makes it nearly impossible to prove tenant-caused damage later.
Can digital inspection records replace paper forms legally?
Digital inspection records are legally valid when they include timestamped entries, photo evidence, and verifiable signatures. Cloud-based systems that prevent unauthorized edits after signing provide stronger legal protection than paper forms, which can be lost or altered.