How to Document the Tenant Move-In Process Right

TL;DR:
- Proper documentation of tenant move-in processes, including signed reports and timestamped photos, is essential for legal protection. Collect all necessary documents before key handover and verify utility transfers promptly to prevent disputes. Using digital tools like Landlordforms streamlines record-keeping and reduces the risk of missing or lost information.
Properly documenting the tenant move-in process is the single most effective way to protect yourself in a security deposit dispute. Get it right before handing over keys, and you have a legally defensible baseline. Skip it, and you’re relying on memory when a tenant disputes a $1,200 carpet replacement. The core documents you need are a signed lease, proof of renter’s insurance, government-issued photo IDs for every adult, and a fully signed move-in condition report.
Here’s what that documentation package looks like in practice:
- Signed lease agreement with all required state disclosures attached
- Renter’s insurance proof showing active coverage before key handover
- Government-issued photo ID for every adult household member (18+)
- Move-in condition report completed room by room and signed by both parties
- Timestamped photos matched precisely to written condition notes
- Key and access device receipt documenting every item handed over
- Utility baseline readings or account transfer confirmation
None of these steps happen after key handover. All of them happen before.
Table of Contents
- What documents do landlords need to collect at move-in?
- What does a complete move-in checklist look like?
- How should you communicate with tenants during move-in?
- Which digital tools help you manage move-in documentation?
- Landlordforms cuts the paperwork down to minutes
- FAQ
- Key Takeaways
What documents do landlords need to collect at move-in?
The lease agreement is the foundation of every tenancy, but it’s only one piece of the move-in paperwork requirements. Each document in the package serves a distinct legal or operational purpose, and a gap in any one of them can cost you later.
- Lease and required disclosures: Your lease must include all state-mandated disclosures. Depending on your state, these commonly cover lead paint, mold history, bedbug disclosures, and landlord contact information. Missing a required disclosure creates legal exposure that no amount of good-faith management can repair after the fact.
- Renter’s insurance verification: Require a declarations page showing active coverage before move-in. Many institutional landlords require at least $200,000 in personal liability coverage and name the property as an interested party. Verify the policy is active, not just promised.
- Government-issued photo ID: All adult household members must provide at least one current government-issued photo ID. A driver’s license, passport, state ID, or military ID all qualify.
- Move-in condition report: A room-by-room condition report covering walls, flooring, ceilings, doors, locks, light fixtures, outlets, blinds, screens, smoke detectors, and appliances forms your defensible baseline for any future deposit dispute.
- Key and access device log: Document every front door key, mailbox key, garage remote, gate fob, and access code issued. A signed receipt confirming what was handed over closes the loop on access accountability.
- Utility meter readings: Record electric, gas, and water readings at the moment of possession. This prevents billing disputes if a tenant delays transferring accounts.
Pro Tip: Never hand over keys until every document above is signed and in your file. The sequence matters legally. A condition report signed by both parties before key handover preserves your legal protections; handing keys over first forfeits them.
What does a complete move-in checklist look like?
A reliable tenant onboarding checklist runs in three phases: preparation before move-in day, execution on move-in day, and confirmation after.
Before move-in day
- Verify all turnover work is complete and every system is operational: HVAC, plumbing, appliances, smoke detectors, and CO detectors.
- Rekey all locks. Every prior tenant, vendor, or contractor with a key becomes a liability the moment a new tenant moves in.
- Prepare the full document package: lease, disclosures, condition report form, key receipt, and utility baseline sheet.
- Send a welcome communication 3–5 days before move-in naming the move-in date, what to expect during the walkthrough, and what the tenant will receive at key handover.
- Collect the move-in balance. For ACH payments, collect up to four business days before the lease start date; for certified funds such as a cashier’s check or money order, collect on or before the lease start date.
On move-in day
- Confirm all parties are present and record names, the property address, unit number, date, and start time.
- Walk every room together in the same order every time: entry, living area, kitchen, bathrooms, bedrooms, closets, and any exterior areas.
- Write specific condition notes. “Small scuff on north wall near outlet” is useful. “Good condition” is not.
- Photograph every room with wide shots first for context, then close-ups of any existing defects. Photos must be timestamped and matched exactly to the corresponding written notes, or they fail as legal evidence.
- Have both parties sign and date the condition report. Both keep a copy.
- Hand over keys and all access devices only after the signed condition report is complete.
- Confirm utility transfer status and document the tenant’s account setup or expected transfer date.
After move-in day
- Store the signed condition report, photos, key log, and utility record in a single lease file, accessible at move-out.
- Follow up within 48 hours to confirm utility accounts are active in the tenant’s name.
- Schedule a first-week check-in to catch any issues before they escalate.
How should you communicate with tenants during move-in?
Tenant communication during the move-in period shapes the entire tenancy. Landlords who treat it as an afterthought tend to spend the rest of the lease chasing problems that a few structured touchpoints would have prevented.
- Pre-move-in welcome message (3–5 days out): Name the move-in date, the walkthrough process, what documents to bring, and who to contact with questions. This sets expectations and signals professional management from day one.
- Move-in day walkthrough as a live orientation: Most tenants never read the lease cover to cover. The joint walkthrough is often the only guided explanation of their responsibilities they will ever receive. Walk through HVAC operation, maintenance request procedures, emergency contacts, trash schedules, and any property-specific rules while you’re both standing in the unit.
- Documenting tenant acknowledgments: If a tenant notes a concern during the walkthrough, write it on the condition report with a resolution timeline. A verbal promise without documentation leaves the tenant wondering whether you’ll follow through.
- First-week check-in: A brief contact within seven days gives tenants a clear channel to report anything missed during the walkthrough. Addressing those items quickly signals responsiveness and closes gaps before they become ongoing complaints.
Pro Tip: A move-in walkthrough that doubles as a lease orientation significantly improves tenant understanding of their responsibilities. Tenants who understand the process use it correctly, which means fewer misunderstandings and faster issue resolution throughout the tenancy.

Which digital tools help you manage move-in documentation?
Paper-based move-in records have a predictable failure mode: they get lost, misfiled, or become unreadable by the time a dispute arises two years later. Digital documentation solves all three problems at once.
- Digital lease delivery and e-signature: Platforms that deliver leases via DocuSign or similar e-signature tools create a timestamped record of when the tenant received, reviewed, and signed the lease. This closes the gap between “I sent it” and “they signed it.”
- Timestamped photo storage linked to condition notes: Generic photos stored in a phone’s camera roll are nearly useless in a dispute. Photos labeled by room and item, with timestamps that match the written condition report, are defensible legal evidence. Store them in the same digital file as the signed report.
- Centralized tenant records: Keeping the lease, condition report, photos, key log, and payment records in one place means you can pull the full file at move-out without hunting across three apps and a filing cabinet.
- Automated welcome communications: Scheduling pre-move-in messages and first-week check-ins removes the risk of forgetting a step during a busy leasing season.
- Utility transfer tracking: Log the expected transfer date and follow up within 48 hours of key handover. Landlords who fail to confirm utility transfers can end up responsible for interim charges on tenant-paid accounts.
Move-in documentation failures significantly increase security deposit disputes, with dispute rates jumping from around 10% to over 20% when condition reports and photo evidence are missing. That gap is entirely preventable with consistent digital record-keeping.
Landlordforms automates the creation of inspection reports, organizes tenant information centrally, and tracks rent payments alongside inspection photos, reducing human error and saving landlords time each week. For landlords managing 1 to 150 units, that kind of centralized access matters most when a dispute surfaces months after move-in.
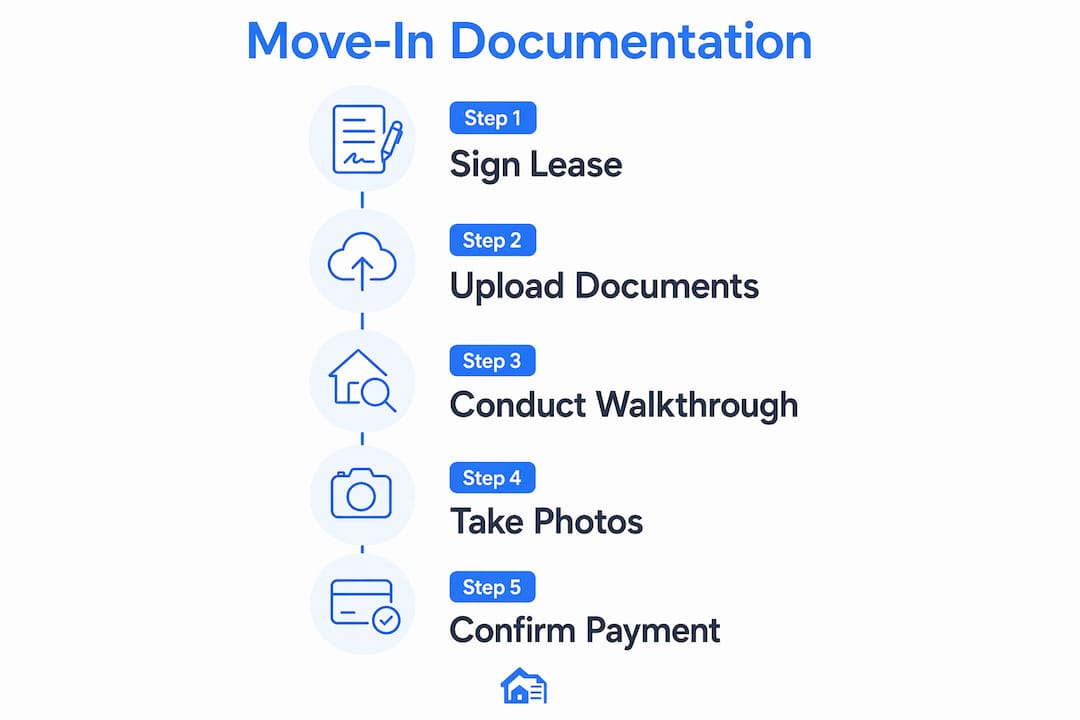
Landlordforms cuts the paperwork down to minutes
Eight hours a week on landlord paperwork is common. With Landlordforms, it doesn’t have to be.

Landlordforms is built specifically for landlords managing 1 to 150 rental units. Instead of manually creating condition reports, rent receipts, and notices from scratch, you generate accurate, professional documents in a few clicks. The platform centralizes tenant information, tracks rent payments in real time, and stores inspection photos alongside the corresponding records so your entire move-in file is in one place when you need it.
For landlords coming from this article, the practical payoff is straightforward: every document covered here, from the move-in checklist to the rent ledger, is available as a ready-to-use template. Start with the free landlord document templates to build your move-in package today.
FAQ
What documents are required for tenant move-in?
The core documents needed for move-in include a signed lease with required disclosures, proof of renter’s insurance, government-issued photo IDs for all adults, and a fully signed move-in condition report. Keys should not be handed over until all of these are complete.
When should the move-in condition report be signed?
Both parties must sign the condition report before any keys or access devices are handed over. Handing over keys before the report is signed forfeits key legal protections in a security deposit dispute.
How should photos be taken during a move-in inspection?
Take wide shots of each room first for context, then close-ups of any existing defects. Photos should be timestamped and matched to the specific written notes on the condition report to serve as valid legal evidence.
How soon should a landlord follow up after move-in?
A check-in within the first week gives tenants a clear channel to report any issues and signals that the property is actively managed. Unresolved concerns from the first week are the first evidence tenants use to form a long-term impression of you.
What is the best way to collect move-in payments?
Collect ACH or eCheck payments up to four business days before the lease start date. For payments closer to move-in, certified funds such as a cashier’s check or money order are the standard requirement.
Key Takeaways
Properly documenting the tenant move-in process requires completing a signed condition report with timestamped photos, collecting all required documents, and handing over keys only after every record is signed.
| Point | Details |
|---|---|
| Sign before key handover | The condition report must be signed by both parties before any keys or access devices are handed over. |
| Match photos to written notes | Timestamped photos must be linked to specific condition notes to serve as valid legal evidence. |
| Send welcome messages early | Pre-move-in communication sent 3–5 days before move-in sets expectations and differentiates professional management. |
| Confirm utility transfers fast | Follow up within 48 hours of key handover to confirm tenant utility accounts are active. |
| Landlordforms centralizes records | Landlordforms stores inspection photos, condition reports, and rent records in one place, reducing errors and saving time. |