5 Types of Inspection Report Documentation Landlords Need

Five inspection report types cover nearly every situation a landlord faces: move-in reports, routine/periodic inspections, move-out reports, repair/rent-ready reports, and specialized inspections for issues like pest, mold, or HVAC problems. The rule that determines whether any of them hold up in a dispute is simple: use the same checklist structure every time and back it with time-stamped photos, so a move-in report and its move-out counterpart can be laid side by side.
That parity matters more than most landlords realize. A move-in checklist that is significantly longer than the move-out checklist tells a judge or mediator that something got skipped, and it undercuts your credibility even when the damage claim itself is legitimate. LandlordForms builds this consistency into its checklist generator and photo documentation tools, so every inspection ties back to the same fields and timestamps automatically.
The five core types at a glance:
- Move-in inspection — baseline condition report, signed by tenant and landlord
- Routine/periodic inspection — scheduled check-ins during the tenancy
- Move-out inspection — direct, item-by-item comparison to the move-in report
- Repair/rent-ready report — documents turnover work between tenants
- Specialized inspections — pest, mold, HVAC, or other issue-specific records
Key Takeaways
Defensible inspection documentation comes down to one rule: use identical checklists at move-in and move-out, and back every entry with time-stamped, matched photos.
| Point | Details |
|---|---|
| Match your checklists | Use the exact same checklist structure at move-in and move-out so nothing looks skipped or inconsistent. |
| Photograph the same angles twice | Shoot identical vantage points at move-in and move-out so damage claims can be directly compared. |
| Write objective, specific notes | Describe measurable details (“six-inch tear”) instead of judgments (“badly damaged”) to keep reports credible. |
| Preserve originals with an audit trail | Store unedited photos and signed reports in backed-up storage that logs access and changes. |
| Automate with LandlordForms | LandlordForms links checklist items to time-stamped photos and exports dispute-ready packets automatically. |
Table of Contents
- Types of Inspection Report Documentation Explained
- Photo and Video Evidence Standards That Hold Up in Disputes
- Building a Standardized Checklist Template
- Notice-to-Enter Timing and Legal Defensibility
- A Practical Workflow: Capture, Label, Store, Share
- How Automation Closes the Documentation Gaps
- Legal Requirements Vary by State and Property Type
- Common Terminology You’ll See in Inspection Reports
- Best Practices for Documenting Defects and Damages
- Avoiding Bias: Keeping Reports Objective and Accurate
- What Actually Separates a Defensible Report From a Vulnerable One
- Let LandlordForms Handle the Paperwork You Just Read About
- Sources
- FAQ
Types of Inspection Report Documentation Explained
Each report type captures different information, and the details you skip are usually the ones that come back to bite you in a dispute.
1. Move-in inspection reports This is your baseline. Walk every room with the tenant present, rate the condition of each item (floors, walls, windows, appliances, fixtures), and photograph anything that already shows wear. Both parties sign the report before the tenant gets keys. Room-by-room move-in checklists are the single document landlords cite most often when winning security deposit disputes, which tells you where to put your effort.
2. Routine/periodic inspections Most landlords inspect occupied units quarterly or semiannually, depending on the lease and local rules. These checks confirm lease compliance (unauthorized pets, unreported occupants), catch maintenance issues early, and verify smoke detectors and safety equipment still work. Keep notes brief but dated.
3. Move-out inspection reports This report only works if it mirrors the move-in report line for line. Note what’s changed, separate normal wear from actual damage, and itemize any cleaning or repair costs you plan to deduct from the deposit.
4. Repair/rent-ready reports Between tenants, document vendor names, repair estimates, and before-and-after photos of any turnover work. This protects you if a new tenant later claims a problem existed before move-in.

5. Specialized inspections Pest infestations, suspected mold, or HVAC failures each trigger their own documentation, often including a licensed inspector’s report, treatment records, and photos of the affected area over time.
Photo and Video Evidence Standards That Hold Up in Disputes
A photo is only as useful as its context. Take a wide shot of the whole room first, then close-ups of anything notable, whether it’s a stain, a crack, or a working smoke detector. At move-out, shoot the exact same angles you used at move-in. Inconsistent framing is one of the fastest ways to weaken a damage claim, since matching angles and preserved image quality are what give photos evidentiary weight in the first place.
A few habits make the difference between usable evidence and a folder of random pictures:
- Keep original files untouched; never crop, filter, or overwrite them
- Preserve embedded timestamps rather than relying on a caption you added later
- Record short narrated video walkthroughs for anything functional (running the faucet, cycling the HVAC, opening every door and window)
- Link each photo’s file ID to the matching checklist row so nothing floats unattached
Pro Tip: Name your photo files with the unit number, date, and checklist item ID before you upload them anywhere. A file named “kitchen_sink_401_20260214” is worth more in a dispute than ten unlabeled images buried in a camera roll.
Building a Standardized Checklist Template
Your checklist is only as strong as its structure. A workable template lists every room and system as its own row: walls, flooring, windows, appliances, smoke and carbon monoxide detectors, and exterior areas like porches or garages.
Each row needs a condition rating (a simple scale works better than open-ended prose) plus a note field for anything the rating alone doesn’t explain. Add a signature line for tenant and landlord, and a field that references the linked photo filenames or IDs for that item.
If your property has a pool, detached garage, or unusual built-in appliance, add a custom section rather than forcing it into a generic row. Downloadable room-by-room templates are a reasonable starting point, but the ones that hold up best are the ones you customize to match what you actually own.
Notice-to-Enter Timing and Legal Defensibility
Most states expect landlords to give tenants 24 to 48 hours’ notice before entering for a routine inspection, though the exact window depends on your local statutes. Document every scheduling attempt, including texts or emails, in case a tenant later claims you entered without proper notice.
Conduct the move-in walkthrough with the tenant physically present whenever possible, and get a signature the same day. A mismatched checklist between move-in and move-out is one of the most common reasons landlords lose deposit disputes, since it looks like the inspection process itself was inconsistent, not just the unit’s condition.
- Give required notice and keep a written or digital log of when it was sent
- Get the tenant’s signature at move-in whenever you can
- Use identical checklists at move-in and move-out, item for item
- Check your state’s specific notice rules before scheduling, since windows vary
Some jurisdictions also require disclosure of known hazards, such as lead paint in buildings constructed before 1978, and your inspection records often double as proof that disclosure happened. This isn’t legal advice: check your local statutes for exact notice periods and disclosure requirements before you finalize your process.
A Practical Workflow: Capture, Label, Store, Share
You don’t need a complicated system, just a consistent one. Four steps cover almost every situation:
- Capture using your standard checklist, linking each photo or short video to its specific item ID as you go
- Label every file with the date, unit number, and item ID, plus a short note tying it back to the checklist entry
- Store originals in secure, backed-up storage that keeps an audit trail of edits and access, and give tenants copies on request
- Share by assembling a dispute packet when needed: move-in report, move-out report, matched photos, repair estimates, and signed acknowledgements
That packet is what actually gets reviewed if a dispute goes to mediation or small claims court, and property-management guides consistently recommend assembling it before you need it, not after.
Pro Tip: Build your dispute packet the same week you complete a move-out inspection, while the photos and notes are still fresh. Waiting until a tenant actually disputes a deduction means reconstructing details from memory, and that’s a fight you don’t need to have.
How Automation Closes the Documentation Gaps
Most landlords don’t lose disputes because they didn’t inspect the unit. They lose because the paperwork doesn’t match up, photos aren’t dated, or nobody can find the move-in report six months later. LandlordForms addresses this directly with automated checklists that stay identical from move-in to move-out, photo documentation with embedded timestamps, and audit trails that log who accessed or edited a record and when.
Read how rental inspections get documented for a fuller breakdown of the reporting process, or see how to generate move-in reports built to hold up in court.
A landlord managing a dozen units switched from paper checklists to a digital, photo-linked system and cut the time spent assembling a dispute packet from an afternoon of searching through old emails to about fifteen minutes of exporting a report.
- Automated checklist matching between move-in and move-out
- Time-stamped photo storage tied to specific checklist items
- Exportable audit trails for disputes or mediation
Legal Requirements Vary by State and Property Type
Inspection documentation rules aren’t uniform. Some states, like California, have specific statutory requirements around move-out inspections, including the tenant’s right to request a pre-move-out walkthrough before the final one. Other states require a written condition report at move-in but say little about ongoing inspections during the tenancy.
Property type matters too. Buildings constructed before 1978 typically fall under federal lead-paint disclosure rules, and your inspection documentation often serves as part of proving that disclosure happened. Properties with pools, elevators, or fire-suppression systems may carry additional inspection requirements tied to local building codes rather than landlord-tenant law specifically.
Multi-unit properties sometimes trigger different notice requirements than single-family rentals, and some cities layer on rent-control-related inspection rules that have nothing to do with your state’s general landlord-tenant statute. None of this is a reason to guess. Pull up your state’s landlord-tenant statute and your city’s municipal code before finalizing your inspection cadence and notice windows, and update your process any time you expand into a new jurisdiction. A checklist that’s fully compliant in one state can leave you exposed in another, particularly around notice periods and disclosure timing.
Common Terminology You’ll See in Inspection Reports
A few terms show up across almost every inspection document, and knowing them helps you write clearer reports and read other people’s more accurately.
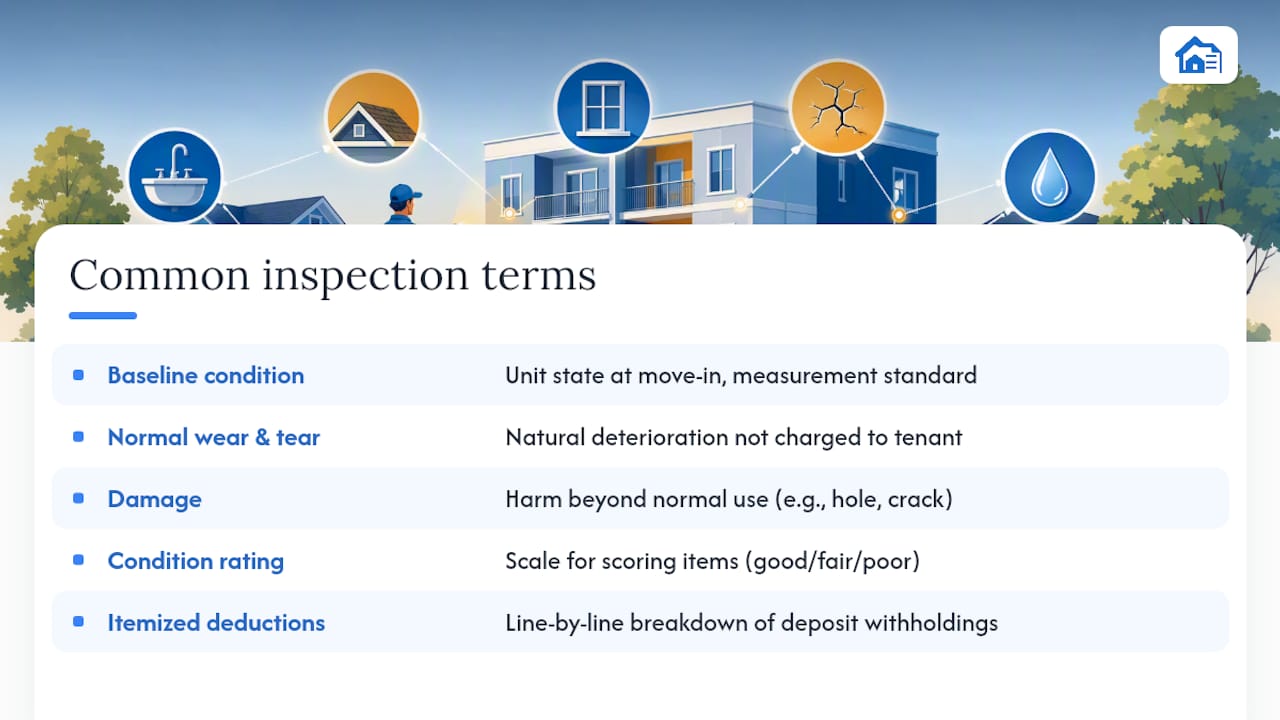
Baseline condition refers to the state of the unit at move-in, the standard everything else gets measured against. Normal wear and tear describes deterioration that happens naturally over time (faded paint, worn carpet paths) and generally can’t be charged to the tenant’s deposit. Damage, by contrast, refers to harm beyond normal use, like a hole punched in drywall or a cracked countertop.
A condition rating is the scale you use to score each item (good, fair, poor, or a numeric equivalent). A signed acknowledgement confirms both parties agree the report reflects reality at that point in time. An audit trail tracks every access or edit to a digital record, which matters if a report’s authenticity is ever questioned.
Rent-ready describes a unit that’s been cleaned and repaired to a standard suitable for a new tenant, and a rent-ready report documents that work. Itemized deductions break down exactly what portion of a security deposit is being withheld and why, line by line, rather than as a lump sum. Learning this vocabulary isn’t just semantics. Using the wrong term in a report (calling damage “wear and tear,” for example) can actually undercut your own claim if the report ever gets read by a mediator or judge.
Best Practices for Documenting Defects and Damages
Specificity beats adjectives every time. “Damaged carpet” tells a judge nothing. “Six-inch tear in living room carpet, three feet from the window, with visible burn mark” tells them everything they need.
A few habits separate documentation that holds up from documentation that gets picked apart:
- Measure damage where you can (size of a hole, length of a scratch) instead of estimating
- Photograph from multiple distances: one shot showing the item in context, one close enough to see detail clearly
- Note the date you first observed the damage, not just the date of the report
- Separate cosmetic issues from functional ones, since they’re often treated differently in deposit law
- Attach cost estimates from an actual vendor rather than a round number you picked
Avoid vague language like “messy” or “not clean” when describing move-out condition. Instead, describe exactly what you found: “grease buildup on stovetop and oven interior” is defensible. “Kitchen was disgusting” is an opinion, and opinions don’t hold up well against a security deposit claim.
Avoiding Bias: Keeping Reports Objective and Accurate
The biggest threat to an inspection report’s credibility isn’t a missing photo. It’s language that sounds like an opinion instead of an observation. Report what you see, not what you assume caused it. “Water stain on ceiling below bathroom” is objective. “Tenant clearly let the bathroom flood” is a conclusion you haven’t proven.
Consistency between inspectors matters too, especially if you or a property manager handles multiple units. Use the same rating scale and the same descriptive language every time, so a “fair” rating in one unit means the same thing in another. If you manage more than a handful of properties, write a one-page internal style guide for how to describe common issues, so every inspection reads the same way regardless of who conducted it.
Timing also affects perceived bias. An inspection done the same day a tenant gives notice looks more objective than one squeezed in weeks later after a dispute has already started brewing. Whenever possible, have a second person review photos and notes before they’re finalized, especially for larger damage claims. A second set of eyes catches missing angles, unclear descriptions, or notes that read more like accusations than observations, and that review step alone can be the difference between a packet that convinces a mediator and one that gets challenged apart.
What Actually Separates a Defensible Report From a Vulnerable One
Most advice on inspection documentation focuses on the wrong layer. Landlords get told to “be thorough” or “take lots of photos,” as if volume were the goal. It isn’t. A forty-photo move-out report with no matching move-in photos is weaker than a twelve-photo report where every single image has a direct counterpart from day one. Matching beats volume, every time.
The conventional wisdom also underplays how much damage inconsistency does on its own. A landlord can have genuinely legitimate damage claims and still lose a dispute because the paperwork looks sloppy or contradictory. That’s not a legal failure. It’s an operations failure, and it’s entirely preventable with the same checklist used twice.
If you take one thing from this, prioritize structure before volume: build one checklist, use it at move-in, and use the identical version at move-out. Everything else, from photo quality to storage, matters less than that single point of consistency.
— Igor
Let LandlordForms Handle the Paperwork You Just Read About
Building consistent checklists by hand, matching photo angles manually, and keeping an audit trail in a shared folder works until you have more than one or two units to track. LandlordForms automates the part that actually causes disputes: it links every photo to its checklist item, timestamps evidence automatically, and stores originals with a full audit trail so nothing gets edited or lost between move-in and move-out.

Two places to start today. Try the move-in/move-out checklist generator to build a template that carries over automatically to your move-out inspection, or download the rent ledger template to keep payment records tied to the same unit history. If you’re juggling a move-in or move-out date that falls mid-month, the rent proration calculator handles the math in seconds. And if turnover cleaning is part of your rent-ready process, a service like Atelier Maids can supply its own move-out cleaning report to fold into your packet.
Sources
- California tenant move-out checklist (2026) — All East Bay Properties
- The ultimate guide to rental property inspection reports — Property Lenz
FAQ
What Are the Main Types of Inspection Report Documentation?
The core types are move-in reports, routine/periodic inspections, move-out reports, repair/rent-ready reports, and specialized inspections for issues like pest, mold, or HVAC problems.
How Often Should Landlords Do Routine Inspections?
Most landlords inspect occupied units quarterly or semiannually, though the right cadence depends on your lease terms and local regulations.
Why Do Move-In and Move-Out Checklists Need to Match?
A mismatched checklist, such as 100 items at move-in and 80 at move-out, makes the entire inspection process look inconsistent and weakens a landlord’s position in a deposit dispute.
What Photo Standards Hold Up Best in Disputes?
Photos should be timestamped, unedited, and shot from the same angles at move-in and move-out, since matching images strengthen evidentiary value in a dispute.
Can LandlordForms Help Automate Inspection Reports?
Yes. LandlordForms generates matching move-in and move-out checklists, timestamps photo documentation automatically, and stores records with an audit trail for disputes.