Generate Move-In Inspection Reports That Hold Up in Court

You can generate a legally defensible, photo-backed move-in inspection report in one on-site walkthrough. The three elements that make it hold up are a room-by-room checklist, date/timestamped photos attached to each line item, and dual signatures from both the tenant and the inspector on the same document.
- Room-by-room checklist: Every room, fixture, and appliance gets its own row with a condition rating and written notes.
- Timestamped photos: At minimum, one wide-angle shot of the room and one close-up per flagged defect, attached directly to the checklist line so they cannot be separated later.
- Dual signatures: Both parties sign the same completed document at handover, before the tenant moves any belongings in.
Pro Tip: Capture a wide shot first to establish context, then move in for a close-up on any defect. Name the file with the unit, room, item, and timestamp right on site — Unit101_Kitchen_Sink_CloseUp_20260401_1045.jpg — so the photo maps unambiguously to its checklist line if the file ever gets separated from the PDF.
Table of Contents
- What does a move-in inspection report actually cover?
- Why a thorough move-in report protects both sides
- What fields does every move-in inspection report need?
- How to generate the move-in inspection report during the walkthrough
- Which template or format should you use?
- Legal pitfalls and state-specific rules to know
- An automation workflow that generates signed, photo-backed reports
- What a filled move-in inspection entry looks like
- Key Takeaways
- What experienced landlords actually do differently
- Landlordforms cuts the paperwork out of move-in inspections
- Authoritative sources, templates, and further reading
- FAQ
What does a move-in inspection report actually cover?
A move-in inspection report is a contemporaneous record of a rental unit’s condition, created at the moment of key handover, before the tenant moves a single piece of furniture through the door. “Contemporaneous” is the operative word. A report written a day later, or after the tenant has already moved in, loses most of its evidentiary value because a court or arbitrator cannot rule out that the tenant caused the damage.

The scope should cover the full interior room by room, any immediate exterior or common areas the tenant is responsible for, all fixtures and appliances, and utility meter readings where applicable. That last item matters more than most landlords realize: a gas or electric meter reading at move-in, initialed by both parties, closes off a whole category of billing disputes later.
The HUD Appendix 5 Move-In/Move-Out Inspection Form is the authoritative U.S. baseline for this document type. It frames the inspection as a joint owner-and-tenant exercise, and it is authorized under 24 CFR § 5.703/5.705, which sets scope and timing requirements for HUD-assisted housing. Even landlords who operate entirely outside HUD programs benefit from following its structure, because courts and housing agencies recognize the format.
The HUD joint inspection format specifies that both the owner or management agent and the tenant conduct the walkthrough together and sign the completed form. That joint-completion requirement is what gives the document its evidentiary weight.
Why a thorough move-in report protects both sides
Security-deposit disputes are, at their core, evidence fights. The landlord claims damage; the tenant denies causing it. Whoever has the better-documented baseline wins. A signed, dated checklist with attached photos establishes condition before the tenant moves in and makes those photos decisive evidence in most deposit fights.
The practical benefits go beyond court. A solid move-in report:
- Speeds up deposit itemization at move-out because you have a clear before-and-after comparison.
- Reduces tenant friction at move-out — tenants who signed the move-in report rarely dispute charges that are clearly documented.
- Helps you avoid small-claims court entirely, because the evidence is so clear that disputes often resolve before filing.
- Protects the tenant too, by capturing pre-existing damage they would otherwise be blamed for.
That last point is worth saying plainly. A move-in checklist protects both parties by recording issues that existed before the tenancy began. Tenants who understand this are far more cooperative during the walkthrough.
State law adds another layer of urgency. Many states require landlords to provide an itemized list of deductions within a specified timeframe after move-out and some states require photographic or written documentation to support any deduction. Without a signed move-in report, a landlord may lose the legal right to keep any portion of the deposit, regardless of the actual damage.

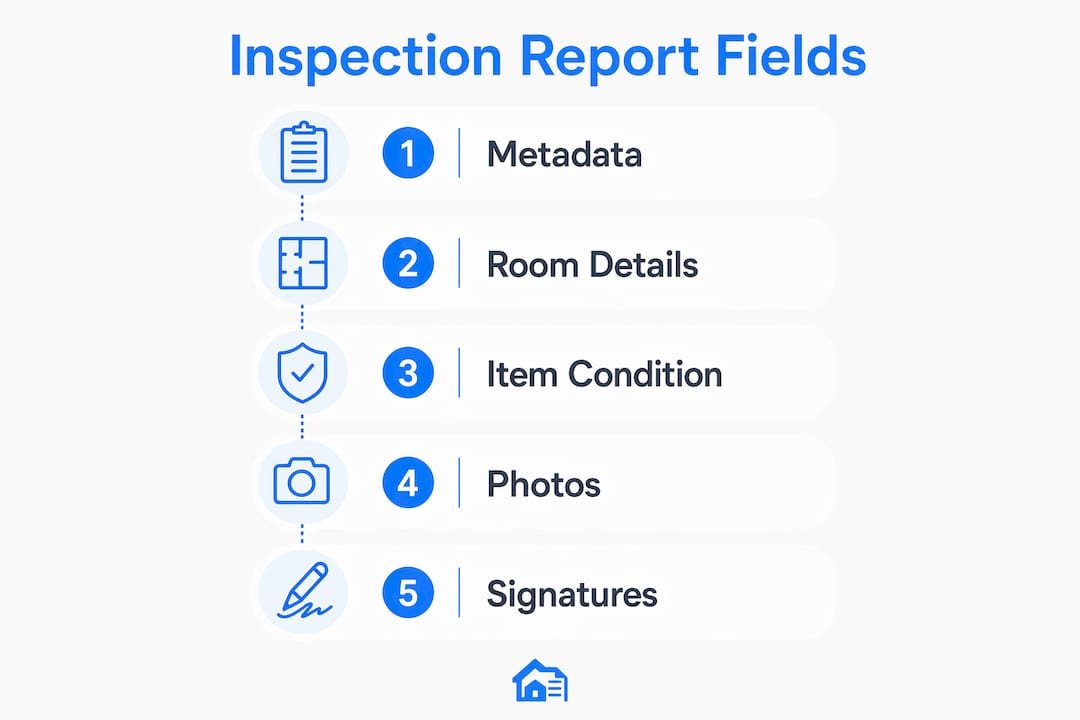
What fields does every move-in inspection report need?
The structure of the report determines whether it functions as evidence or just paperwork. Here is what every defensible report must contain.
Top-level metadata
Property address, unit number, inspection date and time, inspector name and contact, tenant name(s), and lease start date. These fields establish the document’s identity and timing. Without them, the report cannot be tied to a specific tenancy.
Room-by-room rows
Each room gets its own section. Within each section, every item or fixture gets a row.
| Column | Why it matters |
|---|---|
| Room / Location | Anchors the item to a specific space |
| Item / Fixture | Identifies exactly what was inspected |
| Condition Rating | Standardizes language (Good / Cosmetic / Repair Needed) |
| Notes | Captures specifics a rating alone cannot convey |
| Photo Filenames | Links the visual evidence to the checklist line |
| Timestamp | Proves when the photo was taken |
| Severity / Priority | Flags items needing immediate attention |
| Estimated Repair Cost | Useful at move-out for deposit itemization |
Pro Tip: Use three condition ratings only: Good, Cosmetic (minor wear, no repair needed), and Repair Needed. More options slow the walkthrough; fewer options lose nuance. “Cosmetic” is the category that prevents the most disputes — it acknowledges an imperfection without assigning liability.
Supporting fields
Meter readings (gas, electric, water), keys provided and quantity, appliance model numbers, and a final summary page with overall condition notes and both signatures. The appliance model numbers are often skipped and almost always regretted — they matter when an appliance fails and the question of pre-existing damage arises.
Photo requirements
Attach at least two photos per flagged item — one wide contextual shot and one close-up — embedded directly in the signed PDF so they cannot be separated. Photos stored in a separate folder, even a well-organized one, are weaker evidence because the link between photo and checklist line is not self-proving.
How to generate the move-in inspection report during the walkthrough
A well-run walkthrough takes 30–60 minutes for a standard apartment and produces a fully signed, export-ready report before you leave the property. Here is the sequence.
-
Pre-walk prep. Load the property address, unit number, tenant name, and lease start date into your template or app before you arrive. Bring a portable charger. If you are using paper, print two copies. Pre-filling the metadata eliminates the most common source of errors and cuts on-site time significantly.
-
Arrival check-in. Note the exact arrival time on the report. If your app supports GPS check-in, use it — the location stamp adds a layer of verification that is hard to dispute.
-
Walk in a fixed order. Start at the front door and move clockwise through each room. Consistent room order means you never skip a space and your photos follow the same sequence as the checklist.
-
Test everything. Every switch, faucet, outlet, appliance, window lock, and door latch. A defect you miss at move-in becomes a defect you own at move-out.
-
Photograph as you go. Wide shot of the room first, then close-ups of anything rated Cosmetic or Repair Needed. Label each photo on the spot with the naming convention you established before the walk.
-
Record meter readings. Have the tenant initial next to each reading.
-
Review with the tenant. Walk through the completed checklist together before signing. This is where tenant disagreements surface — handle them now, not in a dispute letter six months later. If the tenant disputes a rating, note their objection in the Notes field and have both parties initial the line.
-
Sign on the same document. Both parties sign the completed report — not a separate acknowledgment form, the actual report. Export the PDF immediately and send a copy to the tenant before you leave the property.
App-assisted workflows cut the administrative portion of this process considerably. Inspection apps that bundle photos, ratings, and dual sign-offs into one signed PDF generated on site eliminate the re-entry step entirely, which is where most manual errors occur.
Which template or format should you use?
The right format depends on your portfolio size and how often you need to produce reports.
- Printable PDF templates: Simple, portable, and easy to sign on paper. The right choice for landlords with 1–5 units who want a low-tech solution. The weakness is photo management — photos end up in a separate folder unless you manually embed them.
- HUD Appendix 5: The authoritative baseline for landlords in HUD programs or anyone who wants a court-recognized format. Download it, adapt it to your property, and use it as the structural model even if you reformat it.
- Spreadsheets: Flexible for bulk inventory and cost calculations, but weak for embedded photo evidence. A spreadsheet paired with a PDF export can work for mid-size portfolios, though it requires discipline to keep photos linked to rows.
- Inspection apps: The fastest path to consistent, timestamped, dual-signed PDFs. Mobile-first inspection apps offer room templates, severity tags, GPS metadata, and branded PDF export in one workflow. Best for portfolios of 5 units or more where consistency across reports matters.
A rough decision guide: 1–5 units, use printable PDF templates or the Landlordforms move-in checklist template. 5–50 units, combine templates with occasional app use for complex properties. 50+ units, go app-first and automate the entire pipeline.
Legal pitfalls and state-specific rules to know
The most common reason a move-in report fails in a dispute is not that the landlord skipped the inspection — it is that the report was done wrong.
- Unsigned checklists are the single biggest mistake. A checklist the tenant never signed is a unilateral document. Courts treat it as the landlord’s opinion, not a joint record.
- Photos without context are nearly as bad. A close-up of a stain with no wide shot to establish which room it is in, and no filename that maps to a checklist line, is easy to challenge.
- Inspecting after move-in destroys the baseline. The inspection must happen at key handover, before the tenant moves belongings in. Anything else creates ambiguity about who caused what.
- Failing to attach photos to checklist lines means photos and checklist can be separated. Embed photos in the signed PDF.
Pro Tip: Before the walkthrough, confirm your state’s deposit-return deadline and documentation requirements. Washington State, for example, requires landlords to provide an itemized statement within 30 days of move-out. Other states set different windows. Missing the deadline can void your right to any deduction, regardless of the damage.
State variation is real and consequential. Some states require a written condition inventory or photographs as a precondition for keeping any deposit deduction. Others set strict timelines — 14 days, 21 days, 30 days — for returning the deposit or providing itemized deductions. Check your state housing agency’s guidance before you finalize your template. The North Carolina REALTORS Standard Form 415 is a good example of a state-specific form that captures the required fields and signature lines in a court-recognized format.
When a tenant disputes a rating during the walkthrough, note the objection in writing on the report itself, have both parties initial the disputed line, and proceed. Do not argue the point on site. The written record of the disagreement, signed by both parties, is actually stronger evidence than a clean report the tenant later claims was signed under pressure.
An automation workflow that generates signed, photo-backed reports
Here is how a landlord using a digital workflow generates a complete, signed move-in report without any post-walk data entry.
The property address, unit number, tenant name, and lease start date are pre-loaded in the portal before the walkthrough. The inspector opens the mobile template on site, walks room by room, selects condition ratings, types brief notes, and photographs each flagged item — the photos attach to the checklist line automatically. At the end of the walk, both parties sign on the device. The app generates a branded PDF with embedded photos and metadata, saves it to the property file, and sends a copy to the tenant immediately.
The result is a standardized output every time, across every unit in the portfolio. No re-entry, no missing signatures, no photos in a separate folder. Landlordforms is built for exactly this workflow: it automates form generation, supports photo documentation for inspections, and organizes tenant records in one place, which means landlords managing up to 150 units can produce consistent, professional reports without the manual overhead that causes errors. Users report saving up to eight hours a week on paperwork across all form types, and the inspection workflow is one of the highest-impact areas.
For landlords who want to document the tenant move-in process with a repeatable system, the pre-filled template approach is the single biggest time-saver. Pre-loading unit data before the walk eliminates the most error-prone step in manual report generation.
What a filled move-in inspection entry looks like
A single well-documented checklist line gives you a clear model to follow. Here is one example:
Room: Kitchen Item: Cabinet doors (upper, left of sink) Condition: Cosmetic Notes: Two cabinet doors have minor surface scratches on the exterior face. No structural damage. Hinges functional. Photos: Unit101_Kitchen_Cabinet_Wide_20260401_1032.jpg / Unit101_Kitchen_Cabinet_CloseUp_20260401_1033.jpg Timestamp: April 1, 2026, 10:32 AM Inspector initials: J.R. | Tenant initials: M.T.
The filename convention does the heavy lifting here. Unit number, room, item, shot type, date, and time — all in the filename. A photo named this way maps back to its checklist line even if the PDF is ever separated from the image files. Keep the same convention across every unit and every inspection, and your photo archive becomes searchable by property and date without any additional tagging.
Key Takeaways
A legally defensible move-in inspection report requires a room-by-room checklist, timestamped photos attached to each line item, and dual signatures captured at key handover before the tenant moves in.
| Point | Details |
|---|---|
| Dual signatures are non-negotiable | Both parties must sign the same completed document at handover for the report to function as joint evidence. |
| Photos must attach to checklist lines | Embed a wide shot and close-up per flagged item directly in the signed PDF so they cannot be separated. |
| Timing determines defensibility | Conduct the inspection at key handover, before the tenant moves belongings in, to establish a clean baseline. |
| State rules vary on deposit timelines | Check your state’s deposit-return deadline and documentation requirements before issuing any deductions. |
| Landlordforms automates the workflow | Landlordforms pre-fills unit data, supports photo documentation, and exports signed PDFs, saving landlords up to eight hours a week. |
What experienced landlords actually do differently
Most landlords treat the move-in inspection as a formality. The ones who never lose deposit disputes treat it as an evidence capture event — and the difference shows up in how they pace the walkthrough.
Rushing through a unit in ten minutes to be polite is one of the most expensive habits in property management. A thorough walkthrough takes a typical timeframe for a standard unit. That time investment at move-in is worth far more than the hours you would spend in small-claims court or negotiating a disputed deduction.
On tenant communication: narrate what you are doing as you walk. “I’m noting a small scratch on the cabinet here — I’ll rate it Cosmetic, which means it was there before you moved in and won’t be charged to you.” That kind of transparency turns a potentially adversarial process into a collaborative one. Tenants who feel the inspection is fair are dramatically less likely to dispute the move-out.
When a tenant pushes back on a rating, resist the urge to either cave or argue. Write down their objection, have them initial it, and move on. The written record of the disagreement is actually better evidence than a clean report — it shows the inspection was genuine, not rubber-stamped.
One operational shortcut that saves real time: preload your unit templates with the appliance model numbers, meter locations, and key counts before you arrive. That information rarely changes between tenancies, and pre-filling it means you spend the walkthrough documenting condition, not transcribing serial numbers off appliance labels. Pair that with a photo documentation workflow that uses consistent file naming, and your inspection archive becomes genuinely useful rather than just a compliance checkbox.
The inspection is also the right moment to set the tone for the entire tenancy. A landlord who runs a professional, thorough, fair walkthrough signals to the tenant that the whole relationship will be managed the same way. That signal pays dividends at every renewal and every move-out.
Landlordforms cuts the paperwork out of move-in inspections
Eight hours a week on landlord paperwork is the average before automation. Landlordforms brings that down by handling the forms that eat the most time, and the move-in inspection report is near the top of that list.

Landlordforms is built for landlords managing 1 to 150 units who need professional, consistent documents without the manual overhead. For move-in inspections specifically, it pre-fills property and tenant data, supports photo documentation tied to inspection records, and keeps everything organized in one place so you are ready if a dispute ever surfaces. No re-entry after the walkthrough, no photos floating in a separate folder, no missed signatures.
The move-in checklist template is a good starting point — download it, adapt it to your properties, and use it as the foundation for your inspection workflow. For landlords who want integrated rent tracking alongside their inspection records, the rent ledger template keeps the full tenancy file in one place.
Authoritative sources, templates, and further reading
- HUD Appendix 5: Move-In/Move-Out Inspection Form — the authoritative U.S. baseline for joint owner-tenant inspection format and deposit documentation.
- 24 CFR § 5.705 — Inspection Requirements (e-CFR / Cornell LII) — federal regulation governing scope, timing, and entity responsibilities for HUD housing inspections.
- North Carolina REALTORS Standard Form 415 — a state-specific move-in inspection form with required fields and signature lines.
- Washington State RCW 59.18.260 — example of a state deposit-return statute with itemization and timeline requirements.
- Landlordforms Move-In Checklist Template — downloadable PDF generator for immediate use.
- How Rental Inspections Get Documented — practical guide to documentation standards and portable evidence capture.
- Why deep clean between tenants — guidance on documenting cleanliness standards as part of the move-in condition record.
| Resource | Type | Best for |
|---|---|---|
| HUD Appendix 5 | Federal form (PDF) | Authoritative joint inspection baseline |
| 24 CFR § 5.705 | Federal regulation | Scope and timing requirements |
| NC REALTORS Form 415 | State form (PDF) | State-specific field and signature model |
| WA RCW 59.18.260 | State statute | Deposit-return timeline reference |
| Landlordforms checklist template | Downloadable PDF | Immediate implementation |
FAQ
What is the purpose of a move-in inspection report?
A move-in inspection report creates a contemporaneous, signed record of a rental unit’s condition at key handover. It is the primary evidence used to determine which deposit deductions are legitimate at move-out.
How do you generate a move-in inspection report?
Walk the unit room by room at key handover, rate each item, photograph every flagged defect with a wide shot and close-up, record meter readings, and have both the tenant and inspector sign the completed document before leaving. Export a PDF immediately and give the tenant a copy on the spot.
How do you complete a move-in inspection report correctly?
Conduct the inspection before the tenant moves belongings in, attach timestamped photos to each checklist line, note any tenant objections in writing with initials from both parties, and store the signed PDF in a secure, backed-up property file.
Do landlords actually check rental history during the inspection process?
Rental history is typically reviewed during tenant screening, not during the move-in inspection itself. The inspection focuses exclusively on documenting the physical condition of the unit at handover.
How long does a move-in inspection typically take?
A thorough walkthrough of a standard apartment takes 30–60 minutes. Using a pre-filled digital template with photo attachment cuts the post-walk administrative time to near zero, since the signed PDF is generated on site.